
Well, I Bought a Can of Chalkboard paint....
A few months ago, the chalkboard paint can at the local hardware store began to tease me. I would glance at it for a second or so and then turn away. No! I had enough projects, no chalkboard paint for me! But, then, those glances became long, loving stares--pulling me in. Finally, I couldn't hold back. The chalkboard can lured me in and I fell for it.
So, you are now seeing the results of my new fascination with Mr. Chalkboard Paint!
I've wanted a chalkboard in our place for a while now. I snatched up a cabinet at the Restore for one buck. Yep, just one. I liked this cabinet because it had a little extra snazz!
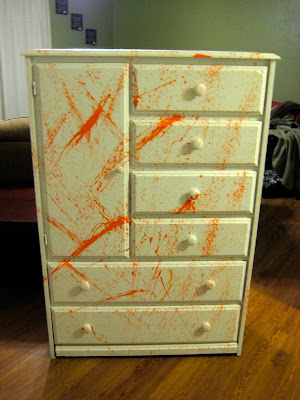
Here it was before I opened Mr. Chalkboard Paint:


So, you are now seeing the results of my new fascination with Mr. Chalkboard Paint!
I've wanted a chalkboard in our place for a while now. I snatched up a cabinet at the Restore for one buck. Yep, just one. I liked this cabinet because it had a little extra snazz!
Here it was before I opened Mr. Chalkboard Paint:

See that little hole, I stuck some wood filler in there, let it dry, gave it a good sanding, and it was good as new! The process for making the chalkboard was pretty simple.
1. Sand a little
2. Prime
3. Paint the center with chalkboard paint (I think I did three coats). Sand lightly between coats.
4. Let dry
5. I taped the outline of the chalkboard part, and then painted the border with an "oops" color.
6. Of course, I gave the chalkboard a good rub down (chalked the whole thing up and then wiped it down).
Here it it about my entry table. I'm happy that I went with the fun color!


Such a simple and fun project!
But....I wasn't done with Mr. Chalkboard paint, I had other plans. Remember these?

The cups and the noodle?
Well, I had some fun experimenting with these and came up with this (plus, another project that I'll show you later!):


A chalkboard teacup!
The how-to:
1. Prime plate and cup (I used spray primer)
2. Paint on the chalkboard paint. I painted it by hand, but you could also use spray paint. I gave this baby three coats--sanding lightly between coats. Give it a day or so to dry well. It's important that you give it time to dry well!
3. Rub chalk all over, wipe it off.
4. That's it!
I'm thinking about making a few more for the Etsy store, but I want to see how they hold up first. It's always good to make sure that the product will hold up! I did make two of these, so you might get a chance to do some "research" yourself! (hint, hint!)
Have a lovely Monday!
I'm linking up to:

Nicole, I love the idea to paint a cup and saucer with chalkboard paint! The repurposed cabinet looks great too. I love the color you chose for the frame. So glad I came across your blog. I'm a new follower.
ReplyDeleteI need your help cuz... I have a lamp and it's shade that need some updating... HELP!!!
ReplyDeleteplus I think I'm gonna take your shelf thing from Target idea and then do this chalkboard paint on it's side... all because you got the bug in me... THANKS!!!